Saturday, March 29, 2008

Cheltenham

it seems appropriate that my first post should be about a quilt that i didn’t even know i wanted to make. i didn’t know this because at least 10 dreamy ideas are already in the planning and purchasing stage. but haven’t you just gone to your LQS to find a particular specimen but as you run your fingers across the neatly stacked bolts you keep stopping to admire what seems to be prints that you could not remember seeing "yesterday” and you just quietly say to yourself "that’s so beautiful but I’m not looking for you today”.

several weeks ago a quilt pattern - with finished quilt hanging for me to admire - captured my attention. specifically designed for asian fabric the use of black sashing made it "friendly” when you just want to use everything you see & love even when they don’t seem to belong together. i told my "non-quilter-but-wants-to-quilt-someday” sister to check it out as she loves this stuff - as do i - but i just knew i didn’t want to make this one. doesn’t that explain why i would share such a discovery. then i found a seemingly simple blue grey & cream specimen that magically had the same strength as the black sashing. however i decided to use it’s power on what is the phenomenon of “shabby-chic” except my very fond childhood memories just refer to it as "very British".

when I was little i lived in the U.K. in the town of Cheltenham in the county of Gloucestershire. maybe the U.K. has changed and become very modern but in the 60’s i was always fascinated by the seemingly unmatching combinations of very large flower & botanical prints in the sitting rooms of our British neighbors. the chair didn’t match the sofa and the attached doily-protector-thingies-draped-over-their-backs-and-arms didn’t match the wallpaper which didn’t match the lampshade which didn’t match the teatray or the teacosy which covered the didn’t match teapot which also didn’t match the teacups and all of this absolutely didn’t match the housedresses &/or aprons worn by the women who were working on yet another didn’t match knitting or crochet thingie which "quietly" sat amongst all of the above in it’s own didn’t match basket. don't even get me started on the fair isle sweaters worn with very large plaid trousers. but to a young girl fascinated by it all - it made perfect sense. completely supported by the television characters in "Coronation Street" and "Til Death Us Do Part” and you have the discovery of the most beautiful messes i have ever seen.

so I’m going to call this quilt Cheltenham.

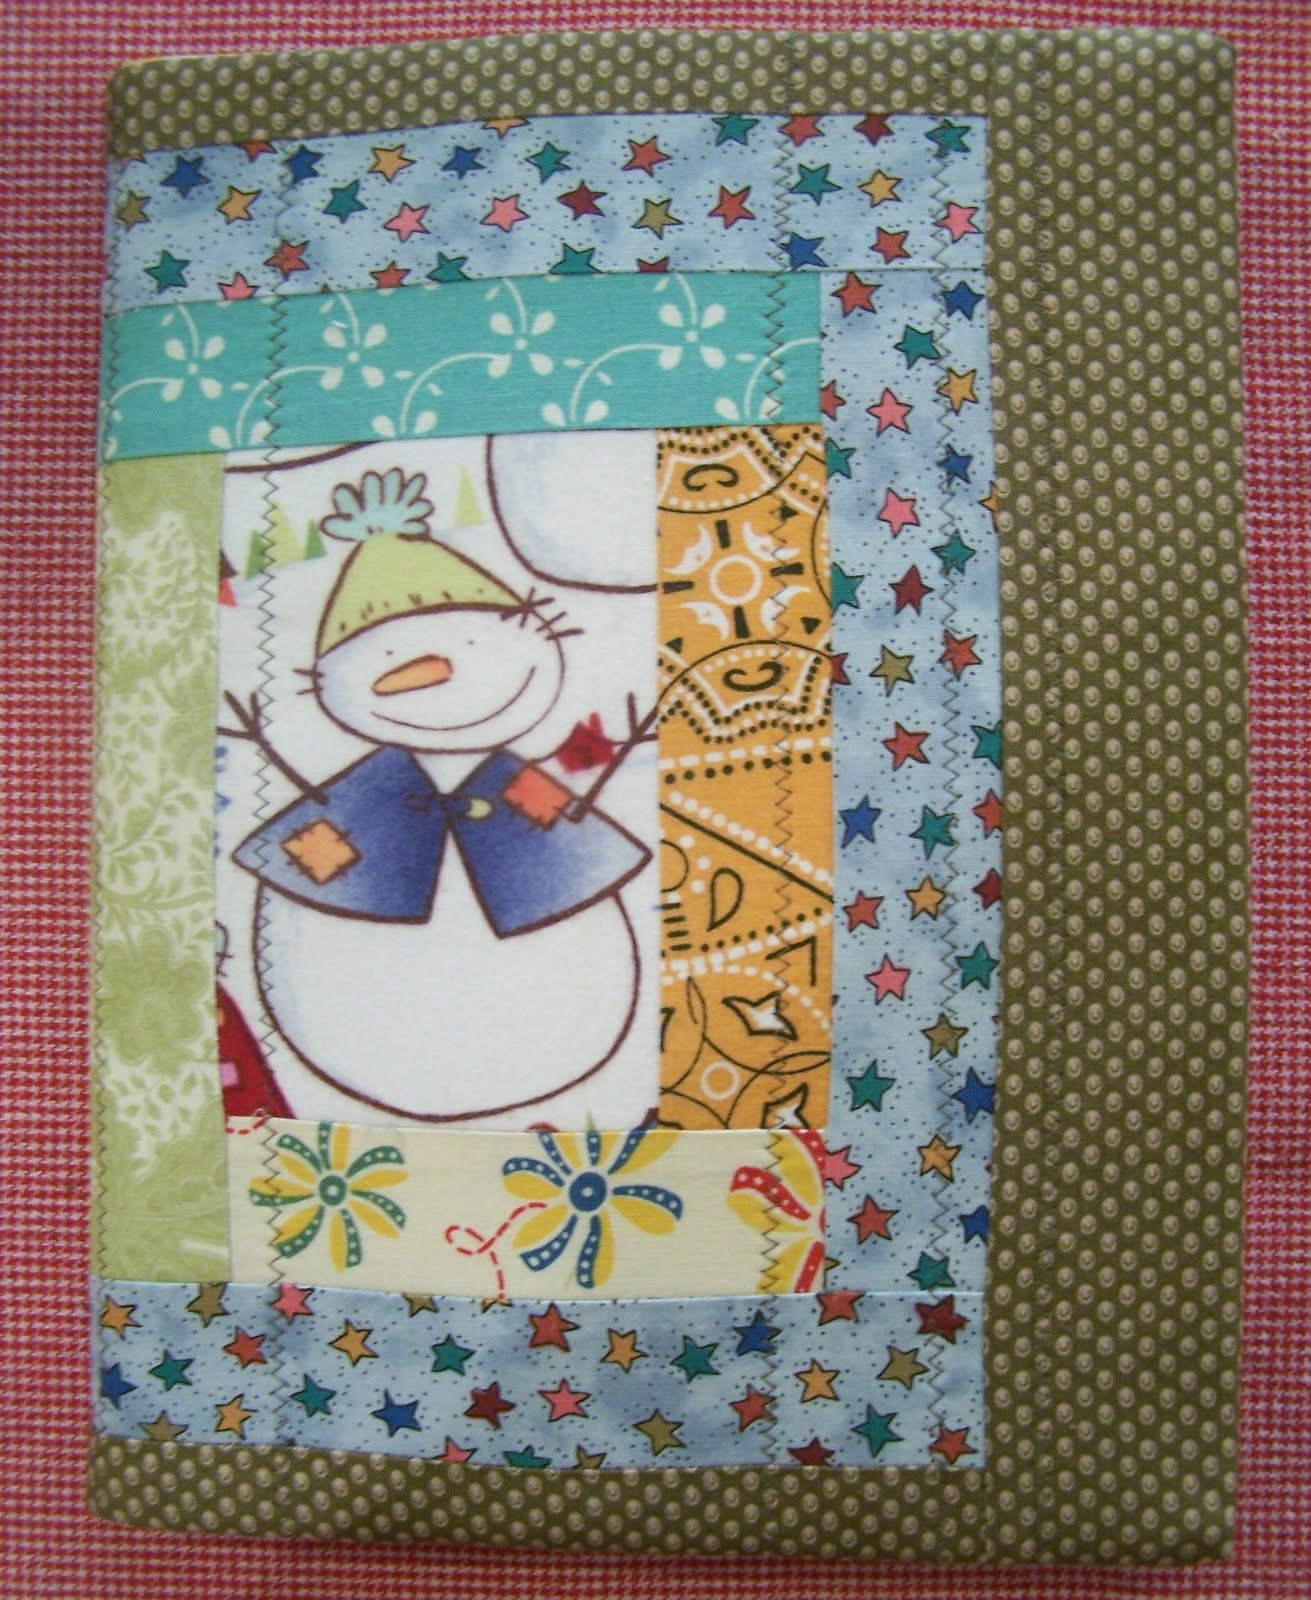
15 fabrics will be joined in a four-square-block. framed with a thin blue border. then a thin folded border. and then sashed with the blue again. above are the precut folded borders.

thanks for stopping by. come back again. then you can see what i've been up to.

Buttons

(starts 2/3/2014).
http://www.lisaclarke.net/2014/02/01/everyday-cardigan//br>

(starts 8/5/2013.)
(my date is 2nd Monday in December.)
http://janesfabrics.blogspot.com/2013/07/for-love-of-hand-embroidery.html


(started 10/22/2012.)
(using lace yarn from stash.
(bought pattern.)
http://chiagu.wordpress.com/2012/09/26/announcing-the-loida-knit-along/

(received pattern 9/2012)
http://brendariddle.blogspot.com.au/2012/08/betsys-stitch-long.html


(sent 4/2012, nothing received but contacted possible sender 7/2012)


(started 4/2012)
http://www.pinkpincushion.blogspot.com/


(cut out 2 projects, hope to finish them someday).


(started 3/2012)
http://www.cloverandviolet.com/p/stitch-quilt-along-index.html

(started 12/2011)
http://thoughtandfound.wordpress.com/oh-my-stars/

(top completed)
http://www.psiquilt.com/2011/06/synchronized-squares-quilt-along.html


(sometimes i make a few yo-yo's)
http://sewtakeahike.typepad.com/sewtakeahike/2011/06/yoyo-along.html

(did not complete)-(but plan to make the Spice Tote Bag)
http://www.sewsweetness.com/2011/07/giveaway-and-sew-along-amy-butler.html

(started 6/2011)-(picked words)-(but need to purchase more colors)
http://cottoncharmquilts.typepad.com/charmingchatter/2011/06/simple-things-quilt-along.html


(quilt 1 completed)-(quilt 2 stuck on design wall)
http://www.thequiltingbookclub.com/

(started)-(on hold)-(rings made)-(on hold as background cutting is tedious)
http://acuppaandacatchup.com/2011/01/whos-ready-for-a-little-quilt-along/

(all blocks made)
http://quiltroom.typepad.com/the_quilt_room/jelly-roll-classic-sampler-bom/

(99% of blocks completed)
http://en.wordpress.com/tag/christmas-cactus-quilt-along/

(started but on hold)-(rethinking background choice)
http://twiddletails.blogspot.com/2010/02/join-pinwheel-party.html

(completed)
http://moosequilts.blogspot.com/2010/02/jelly-roll-sampler-quilt-along-2010.html

http://www.flickr.com/search/?s=int&w=9028401@N03&q=%2252+fridays%22&m=tags

http://pinkpincushion.blogspot.com/2009/08/heres-news.html


http://mumsyblossom.blogspot.com/2008/12/intangible-threads.html

(fabric purchased)-(but on hold while i decide on method of piecing)
http://www.twiddletails.com/store/index.php?main_page=page&id=22

(all bom fabric received)-(thinking about changing background fabric)
http://rainbow-jane.blogspot.com/

(completed)
http://www.psiquilt.com/search/label/quilt%20alongs

(bee has ended)-(having trouble in placing the blocks)
http://www.flickr.com/groups/anotherquiltingbee1/pool/

(99% of blocks sewn together)
http://www.flickr.com/groups/modernsiggyswap/pool/


http://duringquiettime.blogspot.com/2010/01/potholder-pass.html

(completed top)-(purchased backing)
http://cottoncharmquilts.typepad.com/charmingchatter/2009/10/lets-quilt-along.html

http://elefantz.blogspot.com/search/label/Shabby%20Roses%20BOM

http://janesfabrics.blogspot.com/2009/06/spooktacular-halloween-theme-block-swap.html


http://cootiebug2.blogspot.com/

http://loftcreations.blogspot.com/2009/01/time-for-tea-swap-update.html

http://patsloan.typepad.com/pat_sloans_corner/2009/01/the-op.html

http://hugsnkisses.typepad.com/hugsfromhelen/2009/01/the-great-summer-holiday-mystery.html

http://fredashive.blogspot.com/2008/09/christmas-cottage-block-exchange.html

http://messykaren.blogspot.com/2008/07/moment-of-silence.html

Wavy-Wavy Scarf Pattern

please refer to my Wavy-Wavy Scarf Pattern for beginners for tips and hints to successfully knit my Wavy Wiper Pattern into a scarf.

pick needles after making a sample with your yarn.
co 15 sts. start with a 16-20 in. long tail.
when working the next row.
knit 2 sts. then knit 6 sts. holding yarn plus tail.
now drop tail. move tail to front of work. and continue as directed.
k1inc.1 = kfb = knit in front and back of stitch.

increase Row 1. knit until last 2 sts. k1inc.1. k1. (16)
increase Row 2. knit until last 2 sts. k1inc.1. k1. (17)
increase Row 3. knit until last 2 sts. k1inc.1. k1. (18)
increase Row 4. knit until last 2 sts. k1inc.1. k1. (19)
increase Row 5. knit until last 2 sts. k1inc.1. k1. (20)
increase Row 6. knit until last 2 sts. k1inc.1. k1. (21)
increase Row 7. knit until last 2 sts. k1inc.1. k1. (22)
increase Row 8. knit until last 2 sts. k1inc.1. k1. (stitch count now is 23)
you have now completed half a wave.

decrease Row 1. knit until last 3 sts. k2tog. k1. (22)
decrease Row 2. knit until last 3 sts. k2tog. k1. (21)
decrease Row 3. knit until last 3 sts. k2tog. k1. (20)
decrease Row 4. knit until last 3 sts. k2tog. k1. (19)
decrease Row 5. knit until last 3 sts. k2tog. k1. (18)
decrease Row 6. knit until last 3 sts. k2tog. k1. (17)
decrease Row 7. knit until last 3 sts. k2tog. k1. (16)
decrease Row 8. knit until last 3 sts. k2tog. k1. (stitch count is back to 15)
you have now completed a whole wave.

repeat increase Row 1. thru 8. and decrease Row 1. thru 8. until you have reached your desired length and/or only have enough yarn left to make one more repeat.

repeat increase Row 1. thru 8. and decrease Row 1. thru 7.
you should have 16 sts. on your needle.

when working last row. the row with your last k2tog.
you will also be binding off purlwise.
(another way of saying this is. when working this last row.
bind off purlwise until last 3 sts. p2tog. bind off last 2 sts. purlwise.)

weave in ends.

©2009-2012 Karen Kimshel (for your own personal use or for gifts that you are giving).

Wavy-Wavy Scarf Pattern tips for beginners

the pattern repeat is the same as my Wavy Wiper Pattern.
so mostly tips and hints to help you knit my pattern into a scarf.

1. recommended yarns.
you may pick any yarn you like or already have.
but after keeping track of all those in's and out's.
i strongly recommend yarns that will show off the curved edge.
so knit a sample of at least the first 4 bumps.
needles suggested or one size smaller for your yarn works well.

2. keep track of where you are with a moveable marker.
after you complete a pattern repeat.
you will have 8 bumps on the front.
place marker in middle of work.
complete 8 more bumps above this marker.
move the marker to the 8th bump.

3. which side is the front and which side is the back.
if you completed the first row as indicated on the pattern.
there will be a tail stitcking out. that is the back.
place marker on the other side. that is the front.

4. recognizing the completion of a pattern repeat.
you have completed a pattern repeat when:
there are 8 bumps on the front and on the back.
AND there are 15 stitches on the needle.
it is easy to get lost when knitting.
so using and moving a movable marker is extremely helpful.
counting stitches does not entirely indicate when you are increasing or decreasing. and counting 8 bumps etc. from the beginning just takes too long.

5. how to end one skein and attach another.
if you are a beginner you may appreciate this more than others.
when working a right side row work until 7 sts. are left.
end of old yarn will be hanging in the back.
pick up new yarn and hold with the old yarn.
work both yarns together on 4 stitches.
drop old yarn and finish row.

6. from time to time i will add information right here.
on yarns used and yardages needed and finished sizes.

Mirasol T'ika.
100% pima cotton.
2 skeins. 91 yds. each.
#6 needles. 50 in. long. 4 in. wide.

Deborah Norville Everyday.
100% acrylic.
1 skein. 180 yds. each.
#8 needles. 44 in. long. 5 in. wide.

swatching for:
Nice & Knit Worsted.
100% superwash wool.
1 skein. 218 yds. each.
#7 needles. ____ in. long. ____ in. wide.

©2009-2017 Karen Kimshel (the Wavy Wiper Pattern and Wavy-Wavy Scarf Pattern are for your own personal use or for gifts that you are giving).

Wavy Wiper pattern

this is my own pattern for a cloth that i sell on Etsy and that i am sharing with you. please do not use my pattern for anything other than your own personal use or for gifts that you are giving. size 5 needles. cast on 15 sts. Wave #1: knit until last 2 sts. K1inc1. K1. repeat this row 7 more times. stitch count is now 23. knit until last 3 sts. K2tog. K1. repeat this row 7 more times. stitch count is back to 15 sts. Wave #2: repeat Wave #1. Wave #3: repeat Wave #1. EXCEPT when working last row. the row with your last K2tog. you will ALSO be binding off purlwise. (another way of saying this is. when working this last row. bind off purlwise until last 3 sts. P2tog. bind off last 2 sts. purlwise.) mine measures 4 in. x 5 in.

click here for Wavy Wiper pattern for beginners.

©2009-2012 Karen Kimshel (for your own personal use or for gifts that you are giving).

Wavy Wiper pattern for beginners

i prepared this pattern for beginners and for my sister who is not a beginner.
after completing a row, take a pencil, & cross off that row.
life is too short to get lost in a little project!

(01) co 15 sts. #5 needles. start with a 16 in. long tail.
use Lily Sugar'n Cream yarn, or other kitchen cotton you love.
Wave #1:
when working the next row.
knit 2 sts. then knit 6 sts. holding yarn plus tail.
now drop tail. move tail to front of work. and continue as directed.
k1inc.1 = kfb = knit in front and back of stitch.
(02) increase Row 1. knit until last 2 sts. k1inc.1. k1. (16)
(03) increase Row 2. knit until last 2 sts. k1inc.1. k1. (17)
(04) increase Row 3. knit until last 2 sts. k1inc.1. k1. (18)
(05) increase Row 4. knit until last 2 sts. k1inc.1. k1. (19)
(06) increase Row 5. knit until last 2 sts. k1inc.1. k1. (20)
(07) increase Row 6. knit until last 2 sts. k1inc.1. k1. (21)
(08) increase Row 7. knit until last 2 sts. k1inc.1. k1. (22)
(09) increase Row 8. knit until last 2 sts. k1inc.1. k1. (stitch count now is 23)
you have completed half of Wave #1.
(10) decrease Row 1. knit until last 3 sts. k2tog. k1. (22)
(11) decrease Row 2. knit until last 3 sts. k2tog. k1. (21)
(12) decrease Row 3. knit until last 3 sts. k2tog. k1. (20)
(13) decrease Row 4. knit until last 3 sts. k2tog. k1. (19)
(14) decrease Row 5. knit until last 3 sts. k2tog. k1. (18)
(15) decrease Row 6. knit until last 3 sts. k2tog. k1. (17)
(16) decrease Row 7. knit until last 3 sts. k2tog. k1. (16)
(17) decrease Row 8. knit until last 3 sts. k2tog. k1. (stitch count is back to 15)
you have now completed all of Wave #1.
Wave #2:
(18) increase Row 1. knit until last 2 sts. k1inc.1. k1. (16)
(19) increase Row 2. knit until last 2 sts. k1inc.1. k1. (17)
(20) increase Row 3. knit until last 2 sts. k1inc.1. k1. (18)
(21) increase Row 4. knit until last 2 sts. k1inc.1. k1. (19)
(22) increase Row 5. knit until last 2 sts. k1inc.1. k1. (20)
(23) increase Row 6. knit until last 2 sts. k1inc.1. k1. (21)
(24) increase Row 7. knit until last 2 sts. k1inc.1. k1. (22)
(25) increase Row 8. knit until last 2 sts. k1inc.1. k1. (stitch count now is 23)
you have completed half of Wave #2.
(26) decrease Row 1. knit until last 3 sts. k2tog. k1. (22)
(27) decrease Row 2. knit until last 3 sts. k2tog. k1. (21)
(28) decrease Row 3. knit until last 3 sts. k2tog. k1. (20)
(29) decrease Row 4. knit until last 3 sts. k2tog. k1. (19)
(30) decrease Row 5. knit until last 3 sts. k2tog. k1. (18)
(31) decrease Row 6. knit until last 3 sts. k2tog. k1. (17)
(32) decrease Row 7. knit until last 3 sts. k2tog. k1. (16)
(33) decrease Row 8. knit until last 3 sts. k2tog. k1. (stitch count is back to 15)
you have now completed all of Wave #2.
Wave #3:
(34) increase Row 1. knit until last 2 sts. k1inc.1. k1. (16)
(35) increase Row 2. knit until last 2 sts. k1inc.1. k1. (17)
(36) increase Row 3. knit until last 2 sts. k1inc.1. k1. (18)
(37) increase Row 4. knit until last 2 sts. k1inc.1. k1. (19)
(38) increase Row 5. knit until last 2 sts. k1inc.1. k1. (20)
(39) increase Row 6. knit until last 2 sts. k1inc.1. k1. (21)
(40) increase Row 7. knit until last 2 sts. k1inc.1. k1. (22)
(41) increase Row 8. knit until last 2 sts. k1inc.1. k1. (stitch count now is 23)
you have completed half of Wave #3.
(42) decrease Row 1. knit until last 3 sts. k2tog. k1. (22)
(43) decrease Row 2. knit until last 3 sts. k2tog. k1. (21)
(44) decrease Row 3. knit until last 3 sts. k2tog. k1. (20)
(45) decrease Row 4. knit until last 3 sts. k2tog. k1. (19)
(46) decrease Row 5. knit until last 3 sts. k2tog. k1. (18)
(47) decrease Row 6. knit until last 3 sts. k2tog. k1. (17)
(48) decrease Row 7. knit until last 3 sts. k2tog. k1. (stitch count here is 16)
(49) when working last row. the row with your last k2tog.
you will also be binding off purlwise.
(another way of saying this is. when working this last row.
bind off purlwise until last 3 sts. p2tog. bind off last 2 sts. purlwise.)
you have now completed all of Wave #3.
(50) weave in ends.

©2009-2012 Karen Kimshel (for your own personal use or for gifts that you are giving).

Le Petite - a year of small projects

Mon Ami
(1/1/2011) deciding on fabrics.

Prairie Point Christmas
(12/24/2010) finished but not quilted.

Buttern Churn
(11/20/2010) finished but not quilted.

Paganini
(12/2010) all pieces cut and assembling blocks.

Journals

my first journal cover:wrapping for Xmas 2010:Xmas 2010 : gave to Franco :Xmas 2010 : gave to Nora and Mom :Xmas 2010 : gave to Gabbi : 1 extra :Xmas 2010 : gave to Giulia : 1 extra :Xmas 2010 : gave to Vito :Xmas 2010 : gave to Logan :Xmas 2010 : gave to Cole :